
Tutorials Menu
How to Draw Shadow Diagrams >>>
How to Draw Shadow Diagrams in Elevation >>>
How to Draw Shadow Diagrams on Sloping Hilly Site >>>
How to Draw Shadow Diagrams >>>
How to Draw Shadow Diagrams in Elevation >>>
How to Draw Shadow Diagrams on Sloping Hilly Site >>>
How to Generate Shadow lines in AutoCAD with Shadow Multi Cast
This tutorial will show you how to generate shadow lines using Shadow Multi Cast for AutoCAD FULL users.NOTE: North must always be facing up the screen to generate shadows correctly. The first steps show you how to do this.
Setting North Point
| Open Tutorial-1.dwg from the Shadow Multi Cast folder c:/Program Files/Shadow Multi Cast/ |
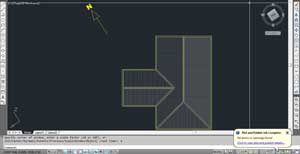 |
| First thing is to save the current AutoCAD UCS. Doing this makes it easier to rotate the screen as you will see later. Goto Shadow Multi Cast menu, highlight over Rotate Screen, Goto Save UCS and left click on Original. Your current UCS is now saved. | 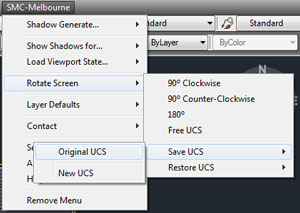 |
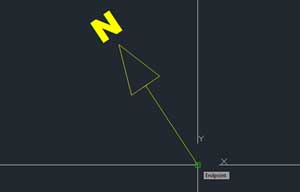
| Next we need to change the screen rotation in AutoCAD to have the north point facing Up the screen. Goto Shadow Multi Cast menu, highlight over Rotate Screen, then left Click Free UCS. You will be prompted to pick a point, pick the bottom point of the North Arrow in the Tutorial-1 drawing. |
 |
| Now Left Click on the top of the arrow. | 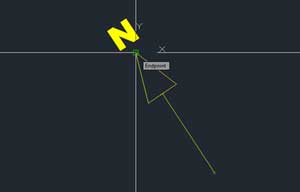 |
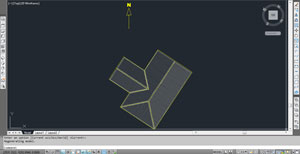
| Your screen should now have the North Arrow facing towards the right of the screen. To make the North Point face up the page, goto the Shadow Multi Cast menu, highlight Rotate Screen then left click 90 Counter-Clockwise. | 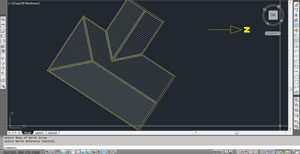 |
| The screen will now rotate and the North Point will be facing up the screen. |
 |
| Now we want to save the UCS again but this time as NEW. Goto Shadow Multi Cast menu, highlight Rotate Screen, highlight Save UCS then left Click New UCS. To switch between Original and New UCS, use the Restore UCS menu under the Rotate Screen option. | 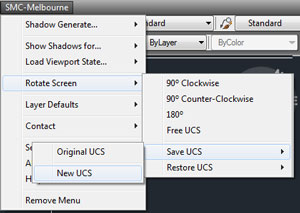 |
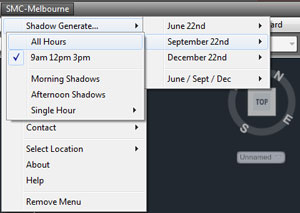
| To start generating shadow lines, goto the Shadow Multi Cast menu and highlight over Shadow Generate. Another menu will appear asking which shadow lines you would like to generate. Select a time (e.g September 22nd) and another menu pops up asking which hours you would like to generate. Select all hours. |
 |
| You are now prompted to pick an insertion point on the building. Pick a point as shown in the diagram. | 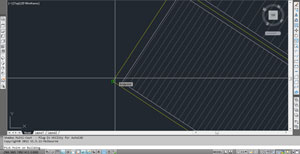  |
| Next you need to type in the wall/roof height at that point. Enter 3000 for 3000mm. |  |
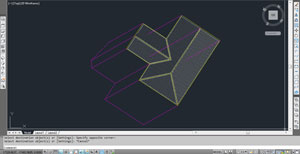
| Congratulations, you have just created your first shadow lines. Continue clicking points and entering heights all around the building. Use any heights you like for the tutorial. | 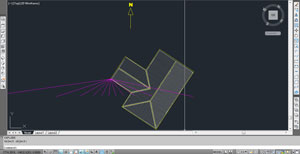 |
| After generating all the shadow lines, the next step is to draw in the outline of the buildings shadow. It can be a little confusing with all the lines showing so turing off all the layers you don't need is useful. To do that easily, goto next step. | 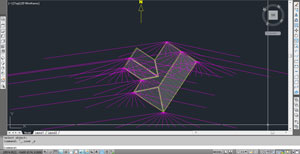 |
| Turn shadow layers on and off is easy using the menu. Goto the Shadow Multi Cast menu, highlight your mouse over Show Shadows for... then select the Month and hour you wish to isolate. Select September 22nd - 9am |
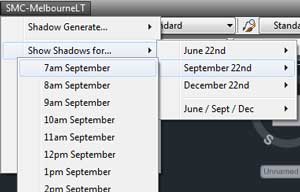 |
| After selecting the hour, all other layers are turned off as shown in the diagram. | 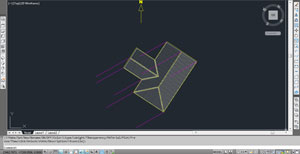 |
| Now it's time to start drawing in the shadows. Turn on OSNAP if not already by pressing F3, and make sure it is set to snap to Endpoints. (To do that type OSNAP, then tick the box endpoint) Also, make sure you make the layer shown current so when you draw in the shadow outline it is on the same layer (i.e Make 9amSept layer current) Now draw in the lines as shown in the diagram. |
 |
| Once you have drawn in the line, you can delete the redundant shadow lines and trim lines that go through the building. Repeat turning on and off layers to draw in all the other shadow outlines. | 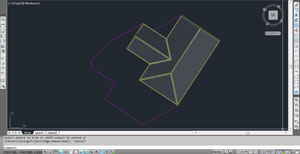 |
| The Load Viewport State in the Shadow Multi Cast menu is to assist in setting up shadow diagrams in paper space. Make sure you are in Paperspace, setup 2 viewport(s) if you haven't already. | 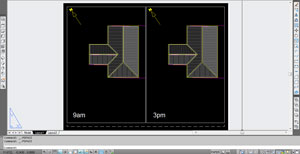 |
| First thing you need to so is turn on all the shadow lines for all the layers. In this example, goto the Shadow Multi Cast menu, Show shadows for..., then click on September 22nd, then Left Click Show All Sept | 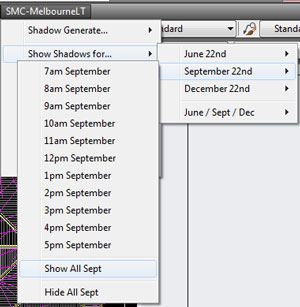 |
| All the layers are now on in Model Space and can be seen in Paper Space as shown in diagram. All those shadow lines are messy, lets fix it up in the next step. | 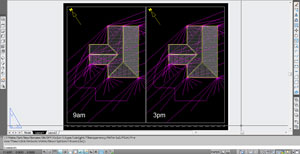 |
| Double click in the left viewport. Once inside the viewport, goto Shadow Multi Cast menu, scroll down to Load Viewport State, then Select September 22nd, then Click on 9am. All the layers except for Sept9am are frozen in the viewport. All the layers are still on in Model Space but are frozen in Paper Space. | 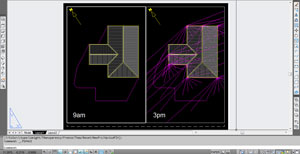 |
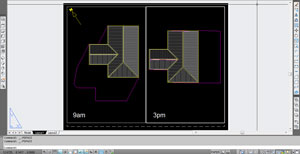
| Double click in the Right Viewport. Again, goto the Shadow Multi Cast menu, highlight Load Viewport State, then Select September 22nd, then Click 3pm. Your drawing should now look like the image to the right. |
 |